Watch out! This is a photo-heavy post :-).I am so excited to share my latest stamp set today.
Vintage Backgrounds is a set I've been wanting to have for a VERY LONG time. It's one of those stamp "staples" that you will use often on your projects for any occasions.
My first card card uses the houndstooth, herringbone and text patterns from
Vintage Backgrounds. With this set, you can customize your border or background to your heart's content. The argyle is one of the digi papers in the
Bright and Grungy Argyles and the polka dot paper in the smallest flower is from the new
Bright and Grungy Dots digi paper pack. The sentiment is from the
Spring Has Sprung set.

I've been enjoying making these paper flowers. The flowers use the herringbone and houndstooth patterns from the set.
The tutorial is at the end of this post.

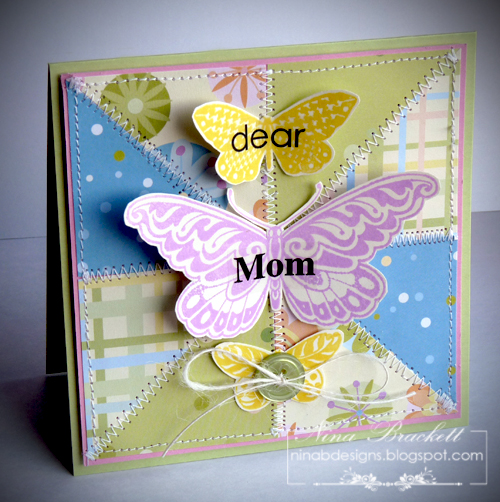
Here's another card using the herringbone pattern as the background. The paper flower uses the houndstooth pattern and the vintage lace image is used as a border. The butterflies and leaves have the text pattern, also included in the
Vintage Backgrounds set. The flower images are from the
Spring Mix Stamp TV kit.

Here's a close up of the flower.

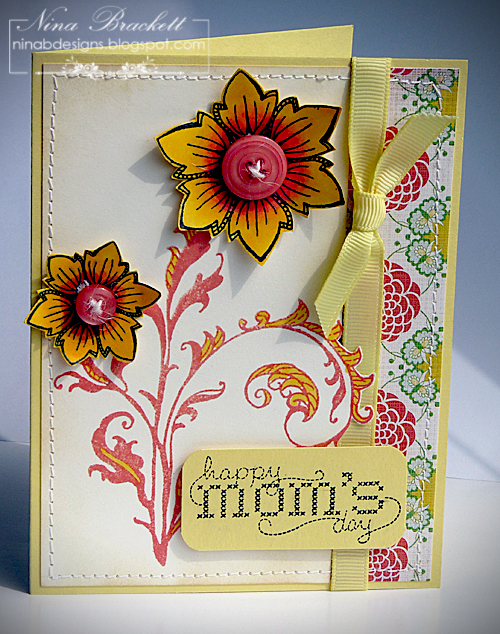
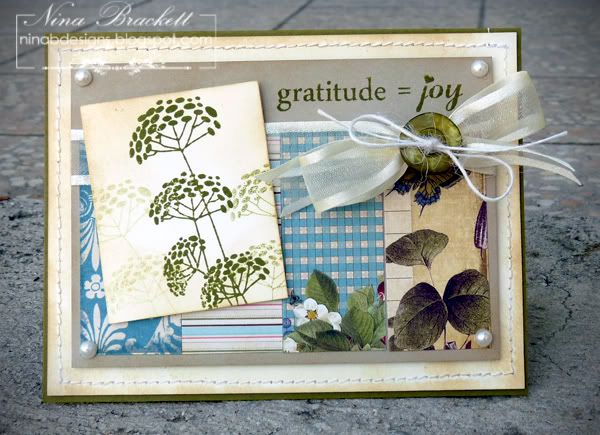
Here's another card that also uses Asela's
Sew Pretty set. I used the text as background for the sentiment and I created a brown border from the houndstooth image. I colored the machine with Copics and swiped it several times with the blender pen to get the retro look I was going for.
 Designers Participating in Previews tonight:
 The
Release Party is tomorrow night on StampTV. We would LOVE to have you join us for the fun! There will be challenges, contest questions, chatter, as well as tons of samples from the Design Team members from 7-10 (central time) all leading to the new products being available in GinaK's online store at 10pm.
---------------------------------
Paper Roses Tutorial -
I don't claim that this idea is originally mine, but I remember doing this as a kid and this is how I made the flowers on my projects :-).
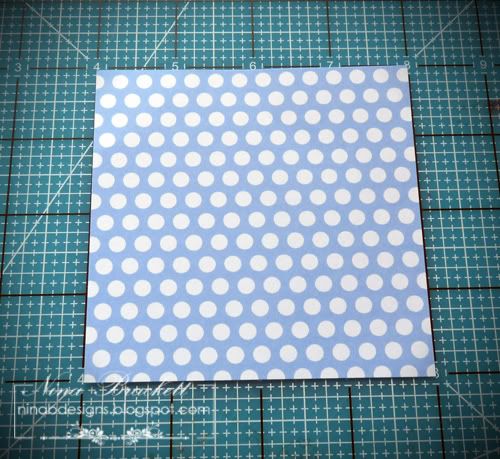
Step 1: Cut a square from patterned paper. I cut a 4" square from one of the polka dot papers from the new
Bright and Grungy Dots pack.
Step 2: Using a pencil, free hand draw a swirl on the back side.

Step 3: Using the swirl as a guide, cut the paper with decorative scissors (or plain as in my second card sample above).

Step 4: Curl up the scalloped edge.
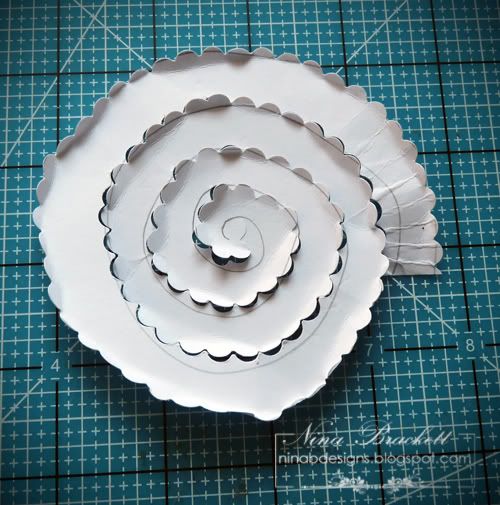
Step 5: Start rolling the strip from the end. Make it as tight as possible.

Step 6: Unwind as much as you'd like. The looser the roll, the wider the flower will be.
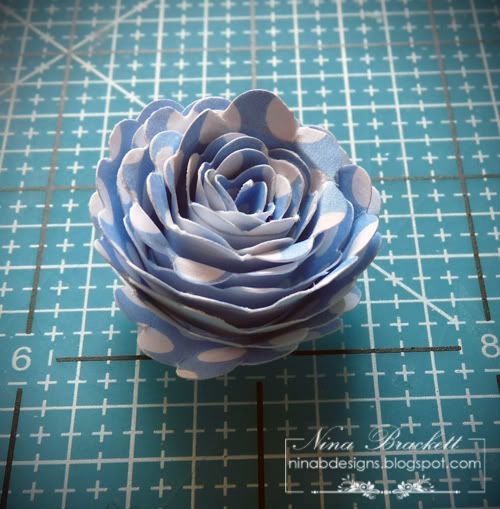
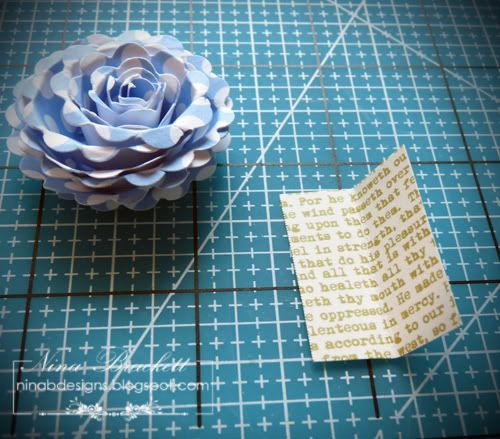
Step 7: Apply glue on the bottom. I found that tacky glue is the best for this technique.Press down and let dry.
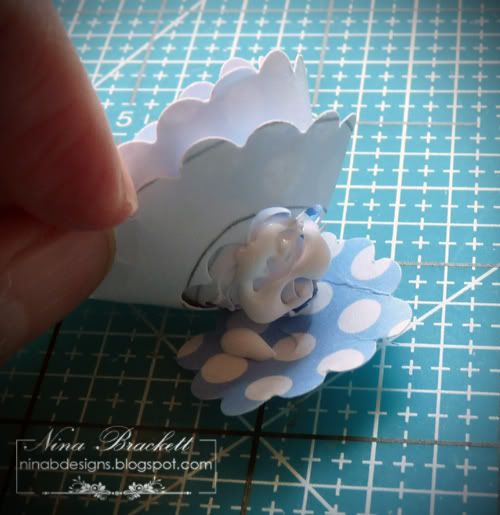
Step 8: For the leaf, cut a small rectangle of paper. I used one with text from the
Vintage Backgrounds set on it.
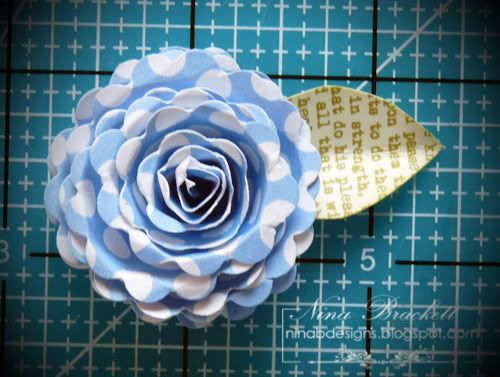
Step 9: Fold paper in half. Cut leaf shape. Adhere to bottom of the flower.
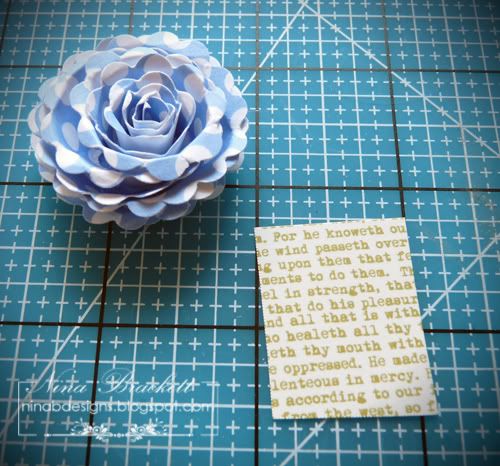
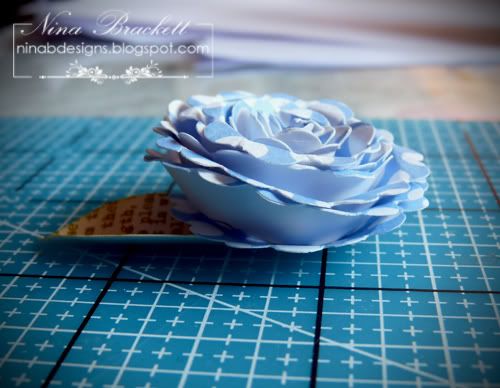
The finished product. I like to put pearls in the center.
Since we're in the subject of flowers, these cards are perfect for the
Stampin' Sisters in Christ challenge going on now!

 Make sure you stop by Unity's blog to see more details of their anniversary celebration and a list of today's Friends With Flair hop.
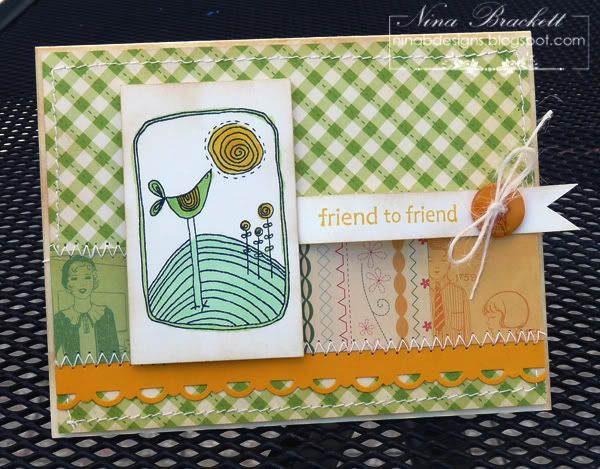
 And I followed the color scheme of bright yellow, spring green and black on my card. I used the sentiment from the Aug08 KOTM and the bird from the July09 KOTM. It's a bit hard to see, but the sentiment is on a curved little banner.