Wednesday, October 30, 2013

Cardinal Cards Using My First Freebie Cut File

Hello, friends. I have something new today. As I said in my previous post, I made a bird cut file to share with you, so you can create your own card using the Mortise Masking technique (aka reverse masking. I didn't even know there's a technical name for it). I'm having fun experimenting with my Silhouette Cameo. I have provided below a link to download the cut file in the most popular versions I know: SVG, Studio, DXF, and PDF. If you think it needs to be in another version, please let me know and I'll try to figure out how to do it.

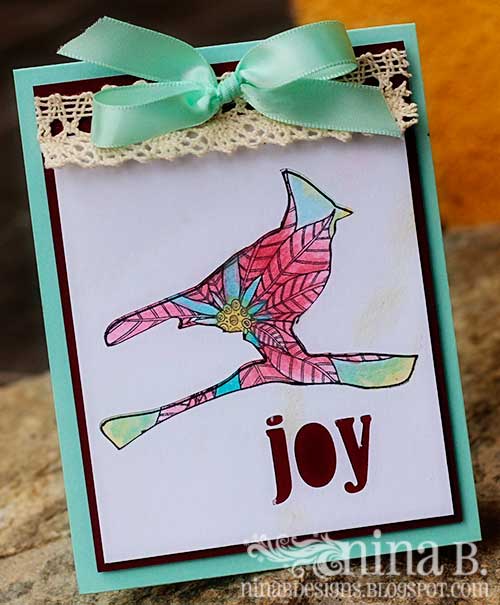
Here are my cards using the cut file. For this one, I cut a white card stock. I then stamped and water colored a Penny Black Poinsettia image. I traced the edges with a thin black marker to highlight the image.
Cardinal-card
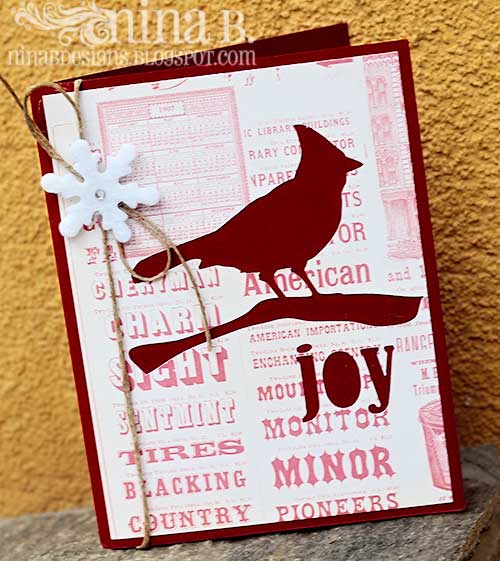
This one is CAS. I just cut a Christmas patterned paper (from Pink Paislee's City Sidewalks) and adhered to a card base. Some twine and felt snowflakes (that I bought ready made) finish the card.
Download the Cardinal Joy Cut files (zip) ***HERE***  If you download it, please note my Terms of Use included in the zip file. Please consider following me on the social networks listed below. Finally, comment below if you use the file and share the link to it for me to see. Thanks, friends!
Follow me on Facebook * Pinterest * Bloglovin'

Monday, October 28, 2013

Penny Black and Moxie Fab Leaf Card

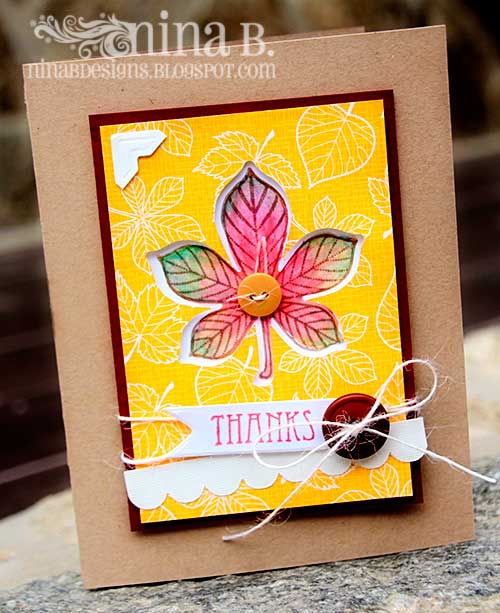
I've been enjoying playing with watercolors since last week and here's another mixed media card I made. I used my Penny Black's Foliage Fancy stamp set and Madison papers for today's card. The leaf and scallop border I made myself using my Silhouette. The tag is from Penny Black's Tagged dies. The Scrapbook Adhesives by 3L photo corner is my favorite little accent lately.
PB-Leaves
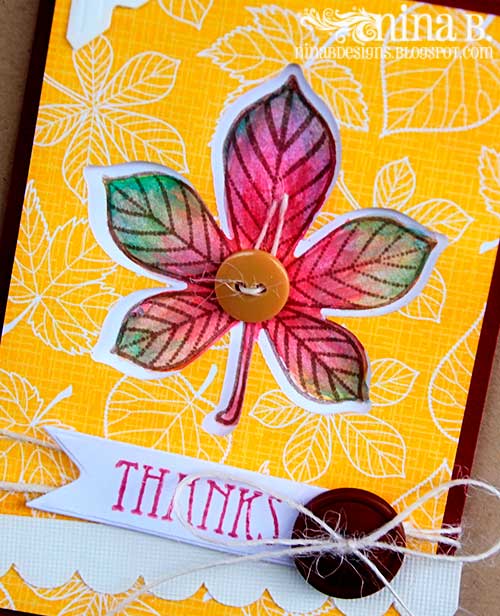
I put the watercolor directly onto the solid leaf image and stamped on a thick cardstock. When it dried, I stamped the line image using Versafine ink. I lined it up so it shows through the negative leaf cut and mounted the leaf patterned paper with SAby3L foam squares.
PB-Leavesd
Photobucket
Follow me on Facebook * Pinterest * Bloglovin'

Friday, October 25, 2013

Inspired by Moxie Fab World: Mixed Media Bird Cards

One of my first paper crafting highlights was winning Moxie Fab World's Value of Vintage Challenge a few years ago. I had just started my paper crafting journey, so the win was a definite push to keep going with my hobby. I appreciate Cath's daily posts on the Moxie Fab World Blog that inspire creativity in my paper crafting. Today's post is one example of that happening. As soon as I saw this photo on the MFW, my mind started visualizing lots of ideas.
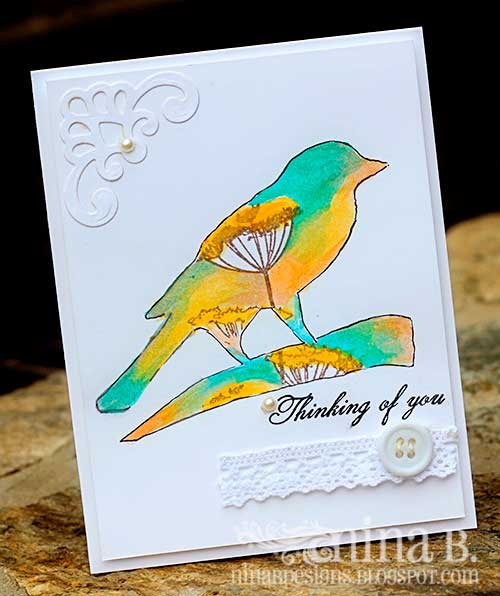
Here are my cards. The first one is clean and simple. I made my bird template by die cutting the big bird from Spellbinders Bird Sanctuary set. I then sketched the legs and branch and cut those out free hand using a craft knife. Using Scrapbook Adhesives by 3L's EZ Dots Repositionables, I adhered the negative die cut, to act as a template, to a sturdy white card stock. The corner die cut is from Spellbinders Moroccan Accents, which I accented with a Want2Scrap pearl.
MM-card-PB
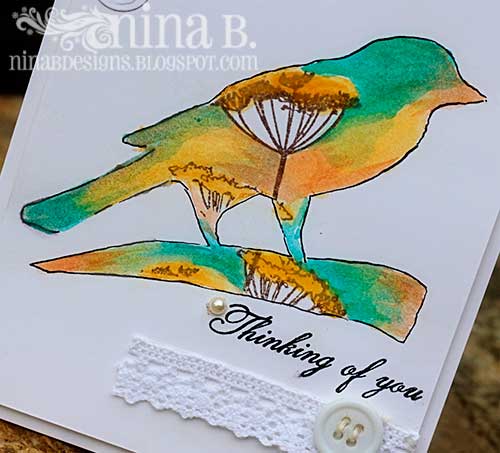
I stamped Penny Black's Tweet Tweet flowers with Versafine ink inside the bird then blended watercolor inks. I traced the bird with a fine black marker. By the way, I used cheap watercolors here. They were left overs from my kids' school art supplies last year. To create balance, I added white lace and button to highlight the sentiment, which is from Penny Black's Dahlia. I mounted the finished bird onto a card base using SA by 3L foam squares.
MM-card-PBd
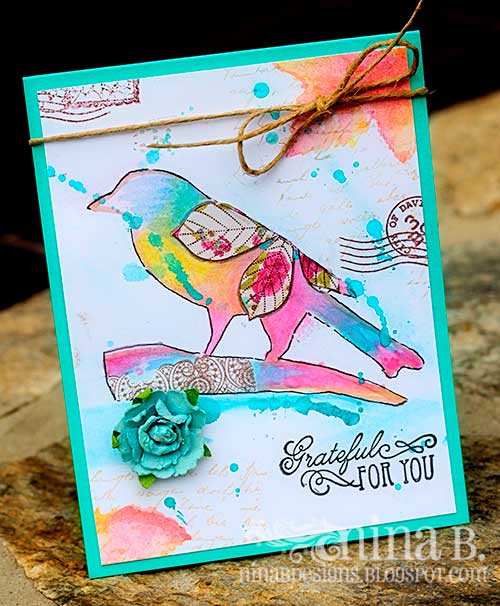
Here is my second card. I used the same bird template flipped over. I did the same thing as above with a few additions. I paper pieced (from Prima) a leaf from Penny Black's Foliage Fancy on the back of the bird and stamped the lace from PB Lace Delights on the branch. I decided to make this more typical mixed media and added backgrounds and other elements.
MM-card-PB.2jpg
I put watercolor straight on the image leaf from Penny Black's Foliage Fancy and stamped on the corners. The text is Penny Black's Letter Background. The cancelled stamped image is from TCM's Holiday Poinsettia. I flicked my watercolor brush with ink to create the blue splatters. Being an amateur that I am with mixed media, I messed up my paper with too much water. Solution: hide it under a pretty paper flower! :).
MM-card-PB2-d
I am not done yet with this Moxie Fab inspirational bird. I'll share more later, including a cut file that I made myself. Have a great weekend!
Photobucket
Follow me on Facebook * Pinterest * Bloglovin'

Wednesday, October 23, 2013

Butternut Squash Minions Tutorial

I shared this photo on my Facebook page the other day and it's been one of my most popular posts so far. I guess I'm not alone in my love for these adorable inions.
I enjoyed making them, with the eager help of my 8 year old. Here are the supplies you will need:
Sketch the overalls with a pencil (right squash) and use that as a guide to adhere masking tape on your squash (left). The front and back will look the same.
Apply yellow paint from top of head to the middle, making sure you don't go past the tape where the overalls will be. I did about 3 layers of paint. Let dry for at least 30 minutes.
Remove tape and carefully paint the overalls with blue paint. I used a mason jar to hold the squash that can't stand by itself upside down. I painted 2 coats and let dry again.
Apply Glazing Medium and let dry. I read that you can add this to the actual paint before applying, but I didn't do that. I just wanted a glazed layer before I add the final touches to my minions.
While paint is drying, make your goggles by die cutting or punching circles from thick cardstock or paper coasters. I cut 4 of these per eye. If you don't have either dies or punches, you can print them out and trace onto thick cardstock and freehand cut them.
Glue together 4 layers of the donut-shaped eyes.
 Rub or paint silver paint over goggles. I made 5 of these because one Minion was going to be one-eyed.
Arrange the squash so you can see how they lean. This will decide how you want their faces to look like. I googled minions and found some expressions I liked and sketched them on the squash with a pencil.
 Draw the faces with the permanent markers. Draw the overalls details (pockets, stitches, etc) with the white pen. I filled in the teeth with the white pen as well. After all the drawings are done, varnish your squash and let dry.
Die cut or punch the bigger circle without holes 6 times. Shape one of these into two eyelids. Apply yellow paint and let dry. Draw in the eyelid edges with black marker. Punch 1/2" circles for the eyeballs and scribble a dot with white pen. Assemble goggles as shown.
Wrap the black ribbon around their heads and adhere with sticky tape. Place goggles over ribbon.
My daughter and I had fun making these. I hope you were inspired to make them, too. Please share in the comments if you post your Minions online. I'd love to see!

Photobucket
Follow me on Facebook * Pinterest * Bloglovin'

Monday, October 21, 2013

The Craft's Meow's October 2013 Release Blog Hop

Welcome to The Craft's Meow's October Release Blog Hop. Thank you for joining us today. If you came from Mindy's blog, then you're at the right spot. To see the full list, make sure you visit the TCM blog. I have 3 cards to show you today.

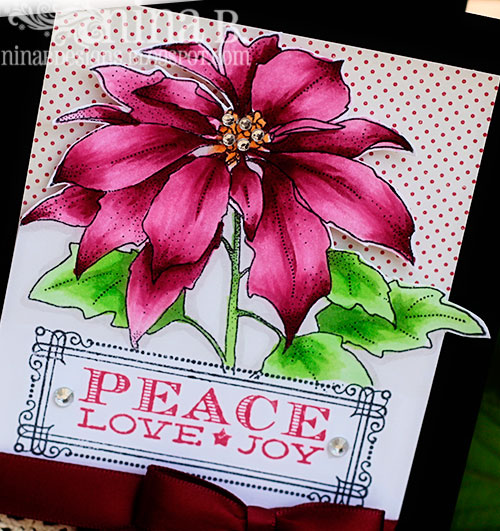
The first one uses my new Holiday Poinsettia set. I colored the main image wtih Copic markers. The polka dot background is from a stash.
Ponsettia2
Here's a close up of the poinsettia. I added some Want2Scrap rhinestones on the center of the flower. This card appeals to those who like the elegant style.
Ponsettia-d
My next card is CAS. I wanted to show how easy it is to make mass-producible card with this set. If you want to see how I used this set in a shabby vintage style, please see yesterday's post.
Ponsettia-cas
My next one uses Clare's Christmas Lantern set. I went all vintage shabby on this one. It's more than I usually do, but I had all these little scraps of paper laying around that seemed perfect to use on my card. The lantern was colored with water color pencils. I added some Want2Scrap blinged SAby3L photo corners on the frame (negative cut of the Spellbinder die cut I used on a previously posted card) to create balance. The papers are Pink Paislee.
TCM-Christmas-Lantern2b
The Craft's Meow is giving away all the new sets. One random commenter will win all six of the newly released stamp sets by leaving comments on the blogs on the hop. You have until 8:00 pm Pacific on Friday, October 23rd to enter. The winner will be announced the next day on the TCM blog.  And don't forget the FREE set with $60 purchase is the Inside Christmas set.
Your next stop is my friend -->> Sharri<<--.
Photobucket
Follow me on Facebook * Pinterest * Bloglovin'
Related Posts with Thumbnails