These sets include tons of sentiments and images that can be used to create a living room scene or stamped by themselves. The sets include both the solid images (for straight stamping) and line images (for coloring and paper piecing).
First up is an elegant wedding card that uses the chandelier image from the set. The sentiment is from Enjoy the Sunshine STV kit and was die cut using the Spellbinders Double End Tags. I used GKD Black Onyx and White cardstocks. The patterned paper is by K&Co. and ribbon by Michael's.
 The rest of the cards below were created as a set. This one uses the GKD Ocean Mist CS, Fly a Kite by October Afternoon. If you look closely, I created a base board using a ScorPal. I also included a miniature version of the chandelier as you see on this card. The chairs were paper pieced.
 Here is another scene with other images from this set. Many of the sentiments in the Fine Furnishings Additions can fit inside the frame. Here you see the solid image version of the couch.
 The GKD team is also previewing the newest Free with Three set, Friends are Forever.
  And remember these paper roses from last release? Here they are again.
 I have another paper flower to show you (the tutorial is at the end of this post). I packaged the cards above in a clear box and added the paper dahlia to make a beautiful hostess gift. The sentiment is from Fine Furnishings Addition.
 For more samples with the stamp sets being previewed tonight, check out these Designers' Links:
- Gina Krupsky *Friends are Forever designer
- Nina Brackett *Fine Furnishings and Fine Furnishings Additions designer - you're here!
- Jessica Fick
- Theresa Momber
- Melanie Muenchinger
- Cathy Tidwell
- Lee Murphy
- Donna Baker
- Lynn Mercurio
- Emily Giovanni
- Erika Martin
- Kurtis Amundson
- Sankari Wegman
- Kay Simmons *May's CenterStage Spotlight Team Member!*
---------------------------------
Paper Dahlia Tutorial: These flowers look bulky, but because they're made of thin paper sheets, you can flatten them for mailing. These would look great on a gift in lieu of a bow, as you can see from my sample above.
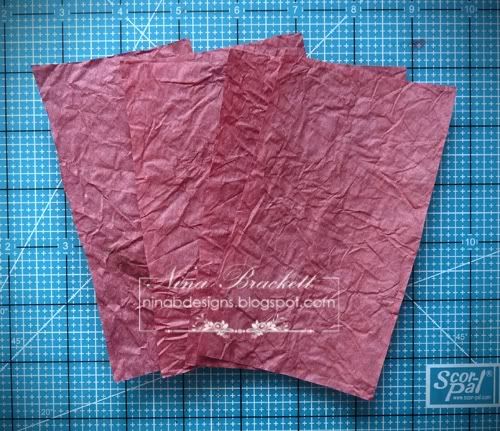
1. Cut 4 sheets of 3.5" x 5" tissue paper. You can also use handmade paper, thin patterned paper, wrapping paper, etc.). The width of the paper determines how wide you want your flower.
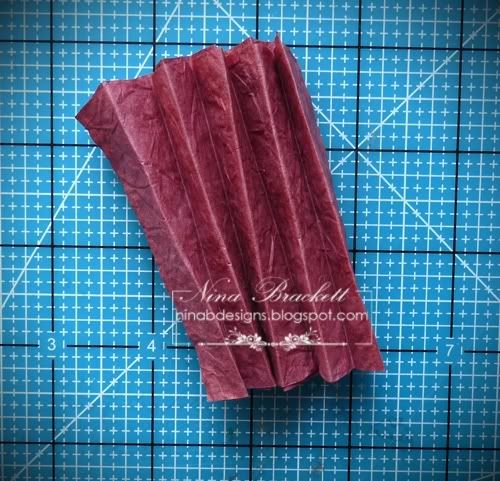
 2. Accordion fold the stack of papers:
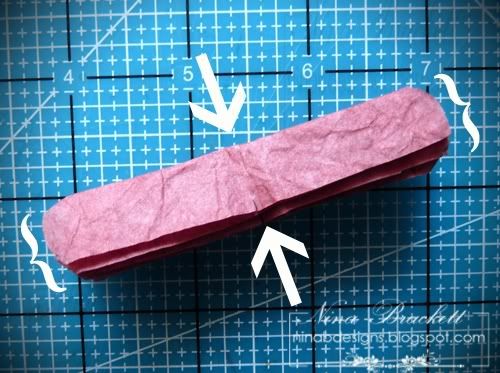
 3. Mark the middle point cut a small slit on each side. Be careful that you don't cut all the way through. Round the ends.
 4. Tie a string through the slits.
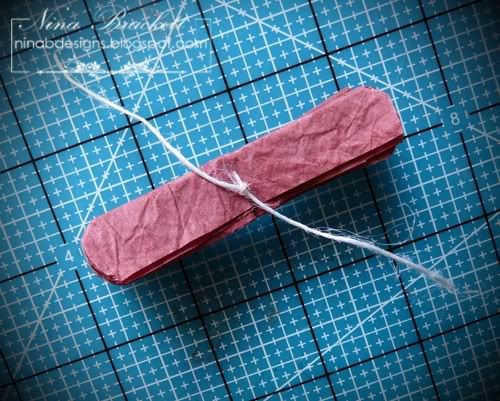 5. Your flower should like this.
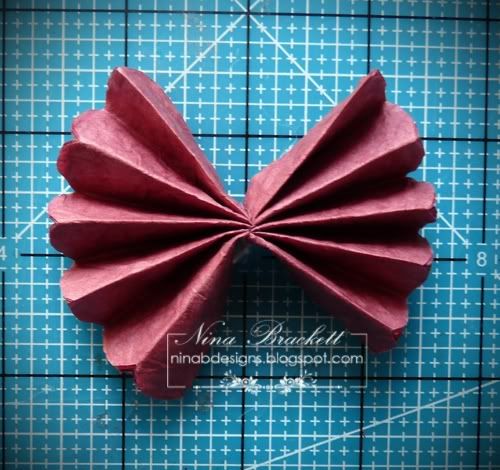 6. Separate the sheets one by one.
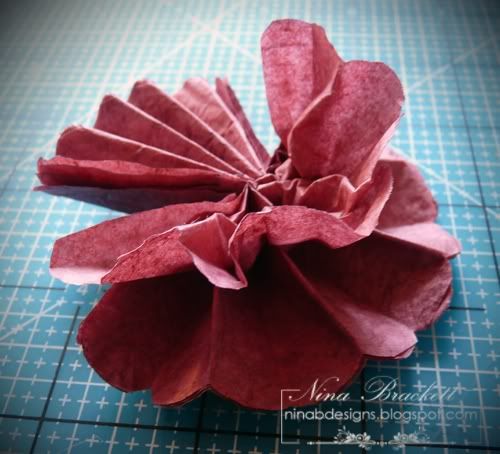 7. Continue to peel each layer until you produce this.
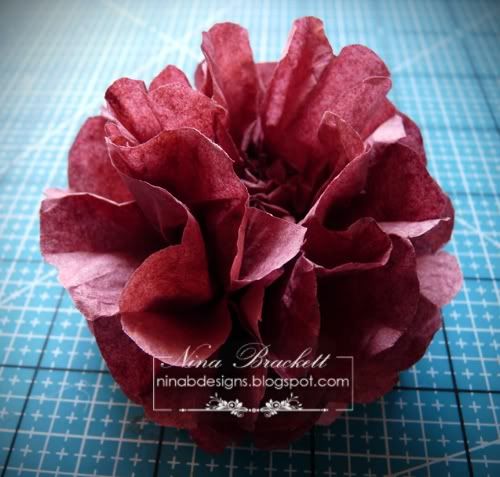 This is the top view. You can decorate the center with buttons, die cut flowers, etc.
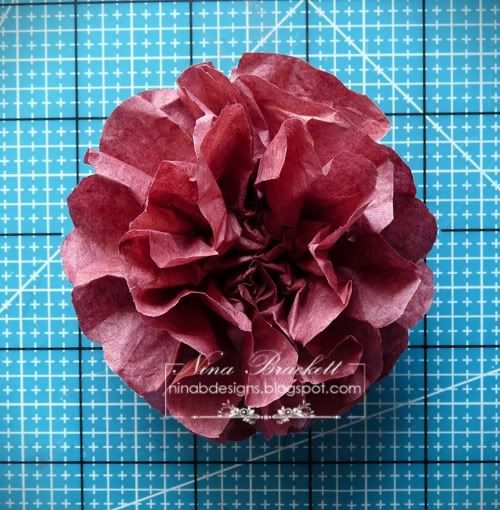 I hope you like it.

OH so gorgeous Nina! Im so loving these new sets this month, such fun to work with too! Love that flower too!
ReplyDeleteBeautiful work on all these cards, Nina and the tutorial is perfect...thanks so much for sharing...God bless : )
ReplyDeleteFabulous cards, Nina! That first one is so striking! Love your new sets!!!
ReplyDeleteOoohhhhhhh..... Love the chandie!!!!! Love the furnishing card....soooo fun!!! Great floral cards & thx sooo much for the tut!!!
ReplyDeleteLOVE it!!! I knew the couch set would be yours! Great job on another awesome set!
ReplyDeleteOh cuuuuuuuuteness Nina!! I love that elegant card with the chandelier!! Those flowers are awesome, I've got to try those!!
ReplyDeleteAll of your cards are amazing, Nina! Your new set is awesome!
ReplyDeletebeautiful cards! love your gorgeous flower!! thanks for the tutorial!!
ReplyDeleteYour new set is great. Love your cards! TFS that flower technique.
ReplyDeleteFabulous looking cards Nina!!! Your dahlia flower is the BOMB :) ~ thanks for sharing the tutoroal....I'll have to try it too!!! Hugs ~S~
ReplyDeleteAmazing Nina! I love this new set. Your cards are wonderful...I especially like that sweet doggie. :) Great tutotrial for the Dahlia.
ReplyDeleteOh NINA---this is FAB FAB FBA! I love ALLLLLLLLLLL of these cards- you have such style and creativity! I love love love that dog on the couch--so clever! I love the first one with the bling and colors:) I love them all! And thanks for the tutorial! Can you send me some tutorials for all your tricks and tips;) LOVE IT!
ReplyDeleteJust noticed that I got really excited and wrote "FBA"!! HA! That translate to REALLY FAB!
ReplyDeleteNina,
ReplyDeleteI LOVE your new sets. I'm going to be getting that one! Your cards are fabulous as always. Love your chandelier image is incredible and the card is striking and elegant.The paper pieced chair card is So pretty. Love the sentiment on that one . Oh and the card with the couch and grandfather clock is super sweet. You've done it again!! I love the paper dahlia tutorial. It's fantastic. Amazing stuff. You Rock!
This is going to be a fun, fun set to play with - I love the idea of paper piecing.
ReplyDeleteNina, you blow me away with every set you illustrate. And I absolutely adore your papercrafting style. The big tissue paper flower is awesome. I will be trying that. :o) Thanks for the tutorial.
ReplyDeletethese are stunning.... I am always amazed by your creative abilities... and I love the tutorial too. Looks so easy... will have to try as I suspect it's not really as easy as it looks LOL
ReplyDeleteNina -- your cards are amazing!! I am in awe of your work!! Thanks for the tutorial so I can give these a try. I truly love this set --- your style is so classic!!
ReplyDeleteBlessings and Hugs!!
Wow! Nina! I love this set but most of all, I love this flower! Great tutorial! I am off to try this! Great job and THANK YOU!!!
ReplyDeleteHugs,
Lisa
nina, i LOVE the chandelier card, your spiral rose card, and thank you for the new flower tutorial!-i'll give them a try:)
ReplyDeleteand, thanks so very much for my goodies package!! it just came today-your such a sweetheart!
FABULOUS cards! LOVE the furniature ones! And thank you for the flower demo! :)
ReplyDeleteFabulous creations. TFS your wonderful flower tutorial!
ReplyDeleteWow Nina, these projects are amazing and love that flower. Thanks for the tutorial on this...gotta give it a try :o)
ReplyDeleteThis flower looks gorgeous - thanks heaps for the tutorial. It looks so easy.
ReplyDeleteHi Nina - I wish I could spend more time here. I love your stamp sets and your ideas. Thank you for sharing with us ♥
ReplyDelete